

In my first post on How to make a bottle cap pendant you learned how to add a design or picture to a flattened bottle cap now, I will teach you how to add pretty beads and charms to the bottom of your design. You will need small beads and or charms to string on a flat head pin and jewelry making tools.
Step 1. Punch a hole directly below your first hole. This is where you will be adding your charms.

Step 2. Lay out your supplies and begin stringing your beads onto your flat head pin.

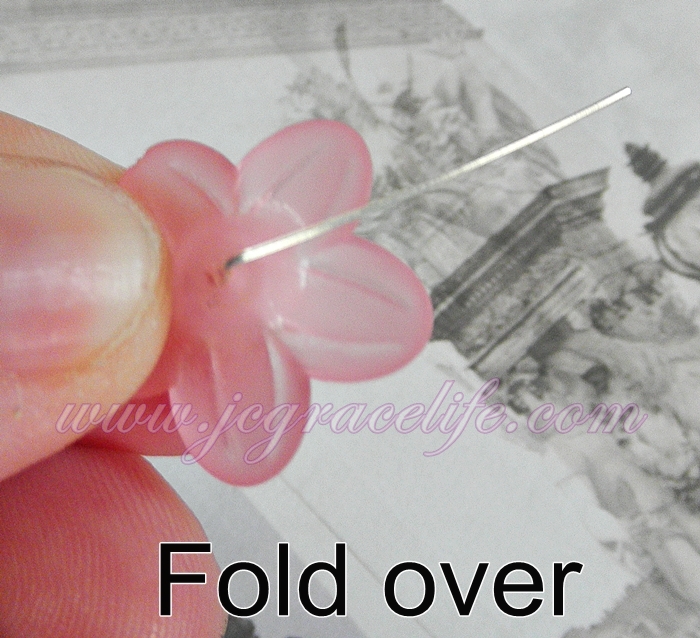
Step.3 Next fold over your head pin.
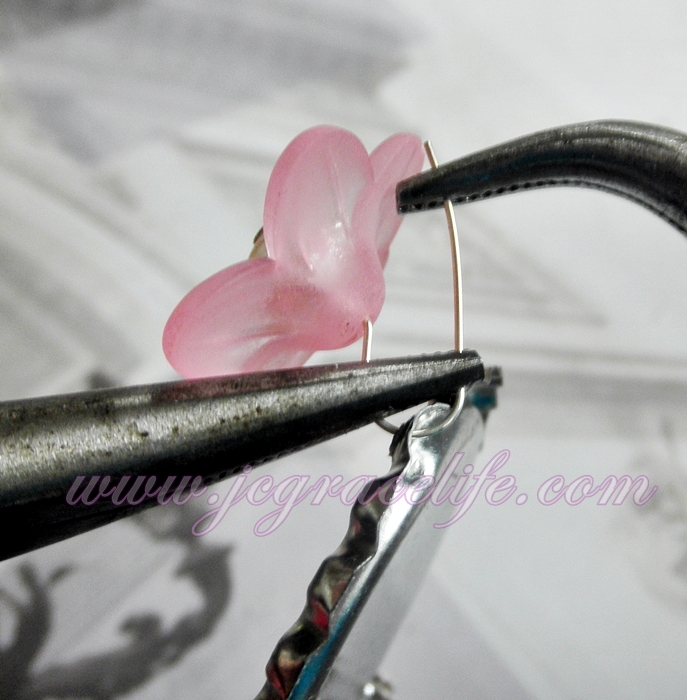
Step4. With round needle nose pliers bend your head pin around the opposite way.

Step 5. It should look like a hook when you bring it over.

Step 6. Now feed your pin through your bottom hole and hold the round part of your hook with flat needle nose pliers.

Step 7. While holding your hook in place with your flat needle nose pliers, use hooked needle nose pliers to wrap the straight edge of your pin around itself.


You can add about 2-3 charms depending on the size. If you want to add more just put a split ring through your bottom hole first and add as many charms as you'd like to split ring.


I hope you enjoyed this tutorial. I had a hard time finding one when I first started out and just wanted to share. If you'd be interested in purchasing a starter kit please leave a comment below this tutorial.
Happy crafting,
Shawna : )

No comments:
Post a Comment