Friday, March 4, 2011
Hope for God's Children March 2011
As some of you may know I am involved in a non-profit group called Hope for God's Children that helps raise funds to pay the cancer treatment bills of Children with late stage Neuroblastoma. This Spring our beneficiary is Kaleigh Justice she is celebrating 1 year in remission, Thank God but, her family needs help raising enough money for a home.
Here is a post from the HGC facebook page....Valerie Justice, divorced, two very sick children. Kayleigh - Neuroblastoma. Aiden - Epilepsy and developmentally delayed. Income $1029 month. Current rent $500 plus utilities. Hope for God's Children's Goal is to help buy them a home.
If God puts it on your heart to help, you can do it in two ways:
1. Make a Boutique purchase through ebay or Etsy using the search term HGC Kaleigh or
2. Donate directly through the HGC blog
ANY amount is welcomed and CAN make a difference.
If you would like to make a purchase the launch will begin March 17th -31st but, you can donate now via the HGC blog
Thank you in advance for helping out this very special family.
Shawna
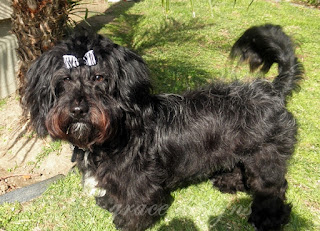
Doggy Bow
Sweet little Sunday has a chronic hair problem. His hair grows over his eyes so, my little Princess and I decided he needed a bow for his hair. She said he can have a black bow because he's a boy. I put one of her pink ones in his hair and she threw a fit so, I made him his own and she's much happier now. I guess zebra qualifies as black, right?
Wednesday, March 2, 2011
How to make a bottle cap pendant part 2 (adding charms)
In my first post on How to make a bottle cap pendant you learned how to add a design or picture to a flattened bottle cap now, I will teach you how to add pretty beads and charms to the bottom of your design. You will need small beads and or charms to string on a flat head pin and jewelry making tools.
Step 1. Punch a hole directly below your first hole. This is where you will be adding your charms.
Step 2. Lay out your supplies and begin stringing your beads onto your flat head pin.
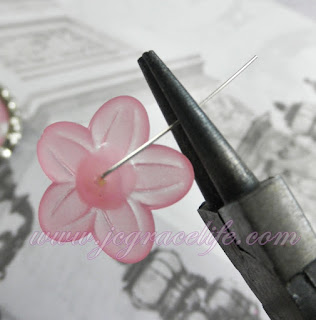
Step.3 Next fold over your head pin.
Step4. With round needle nose pliers bend your head pin around the opposite way.
Step 5. It should look like a hook when you bring it over.
Step 6. Now feed your pin through your bottom hole and hold the round part of your hook with flat needle nose pliers.
Step 7. While holding your hook in place with your flat needle nose pliers, use hooked needle nose pliers to wrap the straight edge of your pin around itself.
continue wrapping until you have no more wire sticking out. It should look like this.
You can add about 2-3 charms depending on the size. If you want to add more just put a split ring through your bottom hole first and add as many charms as you'd like to split ring.
I hope you enjoyed this tutorial. I had a hard time finding one when I first started out and just wanted to share. If you'd be interested in purchasing a starter kit please leave a comment below this tutorial.
Happy crafting,
Shawna : )
Subscribe to:
Comments (Atom)


